How to Start Seedlings using the Pre-sprout Method
Everyone knows the drill - put the seed in the ground, cover it with dirt, keep it watered, and eventually you see that little sprout poking it's way up out of the soil.
Hopefully.

A seed can fail to sprout for a variety of reasons. First, most seeds fall within a range of 50% to 85% germination rate. That means at least 15 out of every 100 seeds are duds, sometimes up to 50 out of 100.
After you weed out the duds (puns are grand, right?) the remaining seeds need exactly the right temperature, moisture, and light (or lack thereof) to initiate the sprouting process. It's been done this way for centuries, but honestly, it's highly inefficient. And frankly, leaves too much up to chance for me. I like to be in control!
This is where pre-sprouting comes in, and it will change your life, just like it changed mine! (OK, maybe not "life-changing," but definitely "life-improving!")
Benefits of pre-sprouting:
Less waste - when planting without pre-sprouting, many gardeners sow 2 or 3 seeds into each hole or container, to ensure that at least one seed will germinate. Often, more than one seed will sprout and then the gardener needs to thin the seedlings, keeping only one living plant.
Saves time - seeds can take 2-3 times longer to germinate when placed directly in growing medium. Plus, you can't see what's going on in order to make adjustments to temperature, light, and moisture.
Tests seeds - many gardeners understandably hesitate to use seeds that were left over from years past. But by pre-sprouting, you're able to test the seeds and plant only the ones that succeed.
As a preface, understand that this method can be used for any seed you are looking to plant. However, I personally use it only for starting seedlings which I am growing indoors under grow lights or on the windowsill. For crops being sown directly into the garden, I still put the seed directly into the ground and cross my fingers it will sprout. But you certainly can pre-sprout seeds before putting them directly into the garden with great results.
So let's get started …
What you'll need:
- Quart-size zippered bags- each type of seed you wish to pre-sprout gets its own separate packet, making organizing and identifying what you are planting MUCH easier
- Permanent marker
- Paper towels
- Heat source- This needs to be a dark area that maintains a temperature of right around 75° Fahrenheit. Some people use the top of their refrigerator, however if you have cats like we do, you will find your seeds on the floor within 24 hours, guaranteed. So I use a heat mat, which is typically used for germinating seeds that are planted in soil within trays or containers. But it works perfect for this task as well. Make sure to use a heat mat with a thermostat, set it to 75°, lay the pre-sprout packets directly on the mat, and you can stack them right on top of each other.
- Foil pan- used to cover the pre-sprouting bags while on their heat source while also blocking-out light
Pre-sprouting Steps:
-Take a length of paper towel (I use 4 sheets that are select-a-size and leave them connected and doubled over.)

-Moisten the paper towel slightly. It needs to be uniformly wet but not dripping. Pat it dry with a towel or squeeze it in your hand to remove excess water
-Lay the moist paper towel flat and arrange seeds on it with at least a couple inches between seeds. Try to stagger the pattern so that when you fold the towel, the seeds won't overlap each other.

-Fold the paper towel in half, sandwiching the seeds within. Fold in half again.
-Slide the paper towel into a quart-sized zippered bag
-Squeeze the air out and zip the bag closed
-Label the bag with the date as well as the type of plant it will grow into
.

-Lay the bag flat on your heat source and cover.
-Now we wait. Germination time varies from plant to plant. Many times the back of the seed packet will give you this information. If not, here's a chart that gives a pretty accurate estimate.

-Keep checking on your seeds. I pull the paper towel out completely every other day to look for signs of life as well as to make sure the paper towel stays moist. If it dries out at all, the seeds will get too hot and will bake. Mist the paper towel with a spray bottle if it seems dry at all.
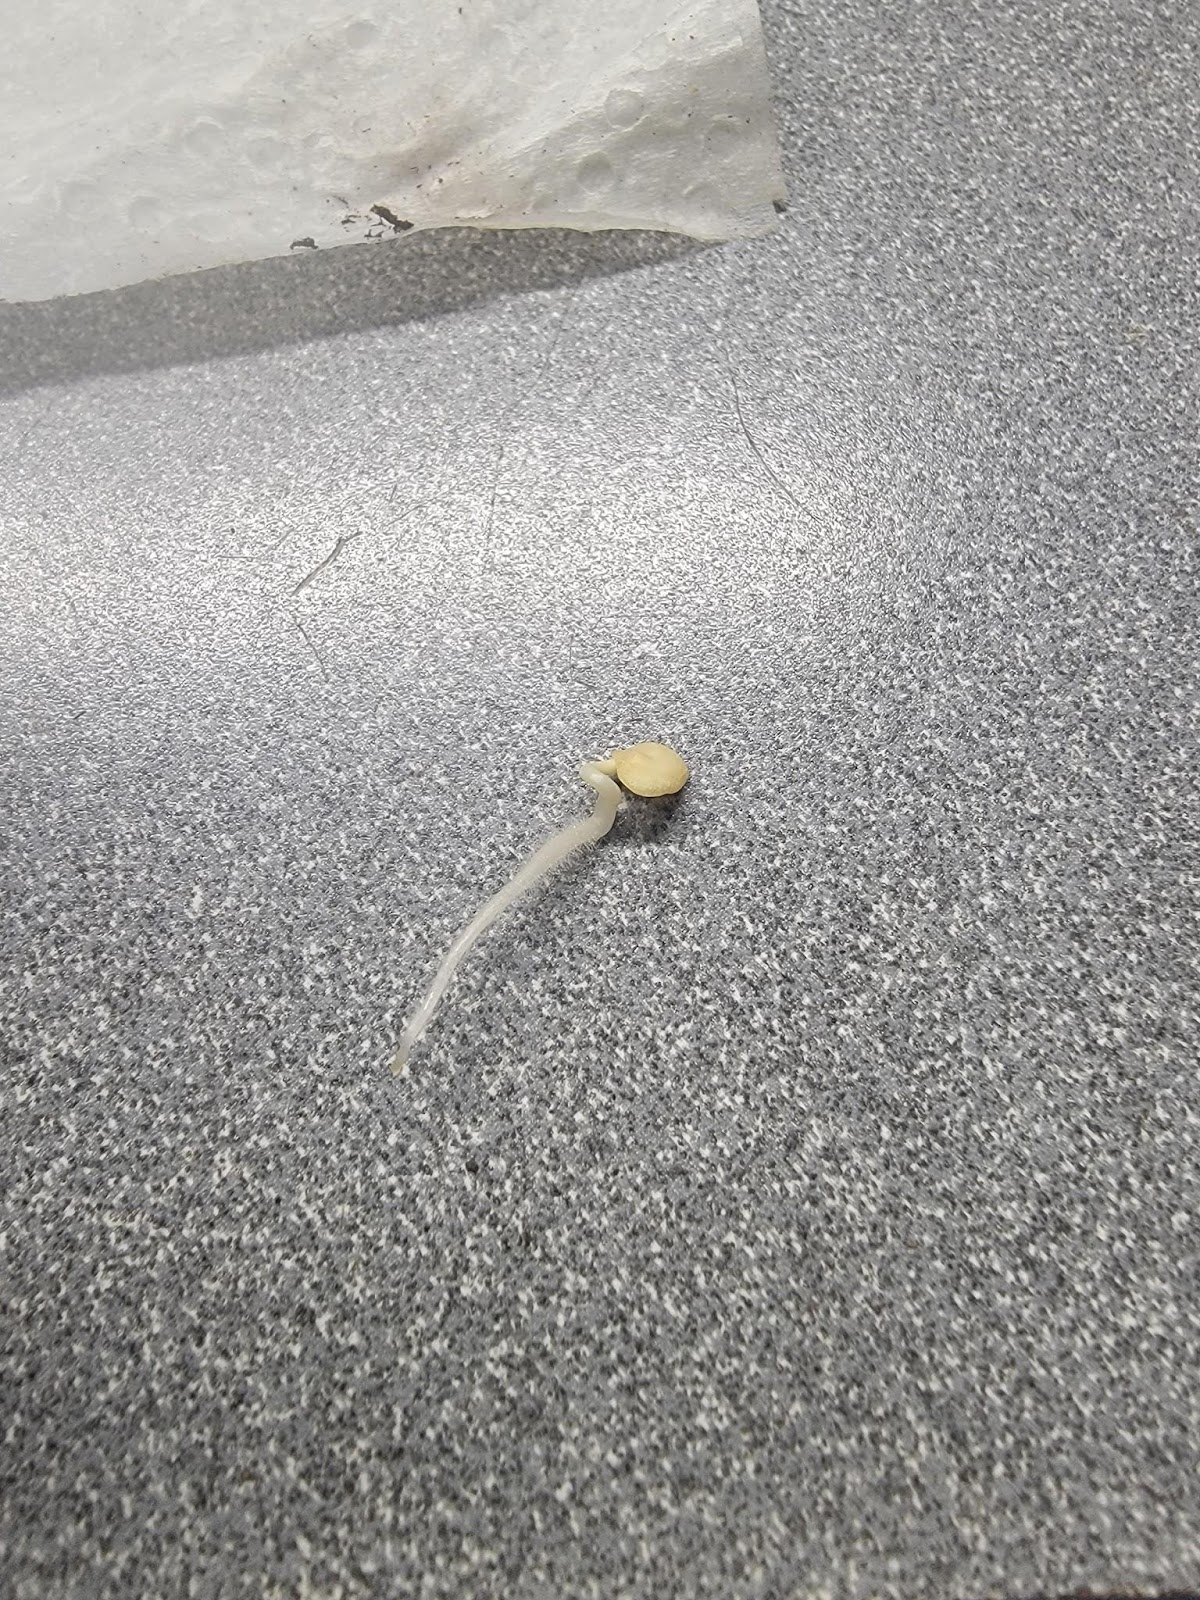
-Eventually, your seeds will look like this:
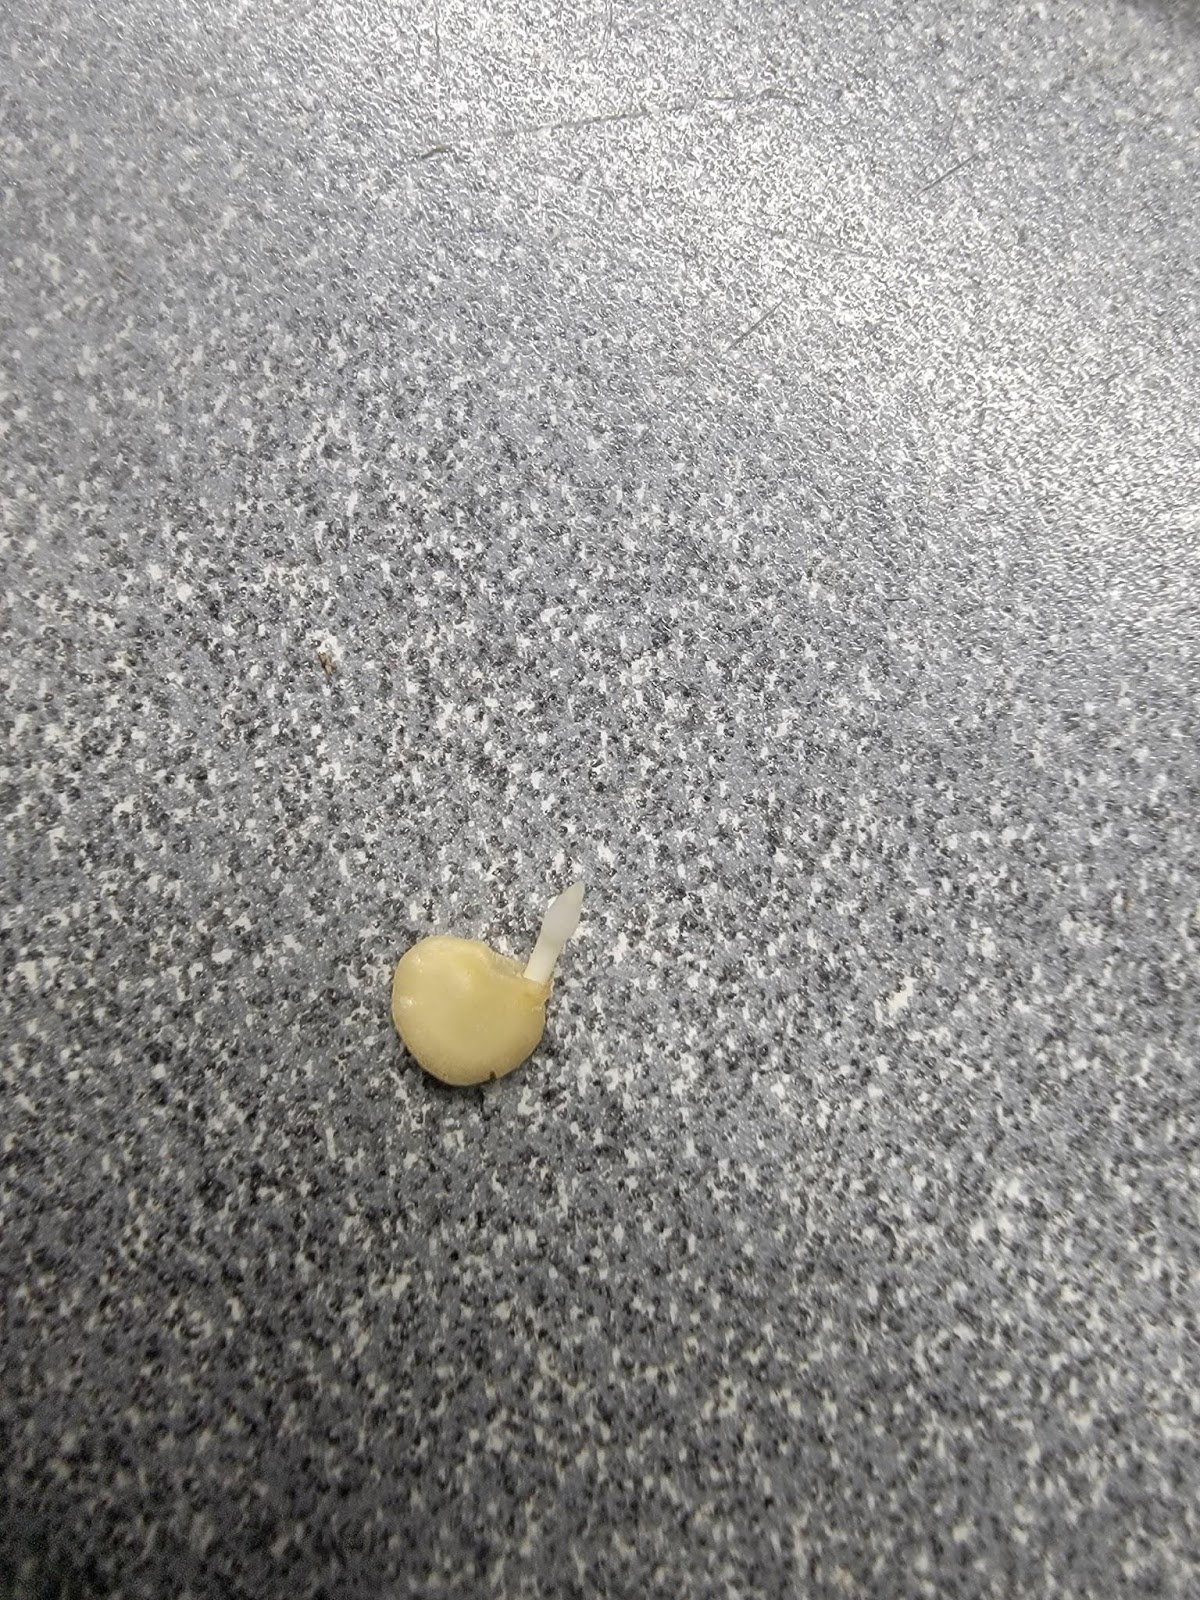
Now, you may be tempted to put it in the dirt as soon as a seed gets to this stage. I've done it, and it works most of the time. Most. But I've found if you let it develop just a little bit longer, you'll begin to see more of the root develop and the seed gets closer to the stage of releasing its cotyledons (seed leaves.) You don't want to wait too long, however, or you run the risk of the seed's roots becoming entangled and embedding themselves in the paper towel. If this happens at all, cut or tear the paper towel instead of damaging the roots, and just plant the seed and piece of paper towel as one.
-Put the pre-sprouted seed in dirt. Orient it so the root (the part furthest from the seed casing) is pointing downward and the seed (still containing the cotyledons) is just at the surface of the soil. Cover the root with dirt and lightly pack the soil around it.

-Now the container is ready for light, either on a windowsill or under grow lights. Within a day or two, you'll see the sprout pushing up from the dirt and within a few days after that, the cotyledons will emerge and you'll have your very own newborn seedling!
Happy Pre-sprouting!!!


Comments
Post a Comment